Grand Precision
Grand Precision
  • Home
  • Diecast Cars
  • New Page
  • Home
  • Diecast Cars
  • New Page
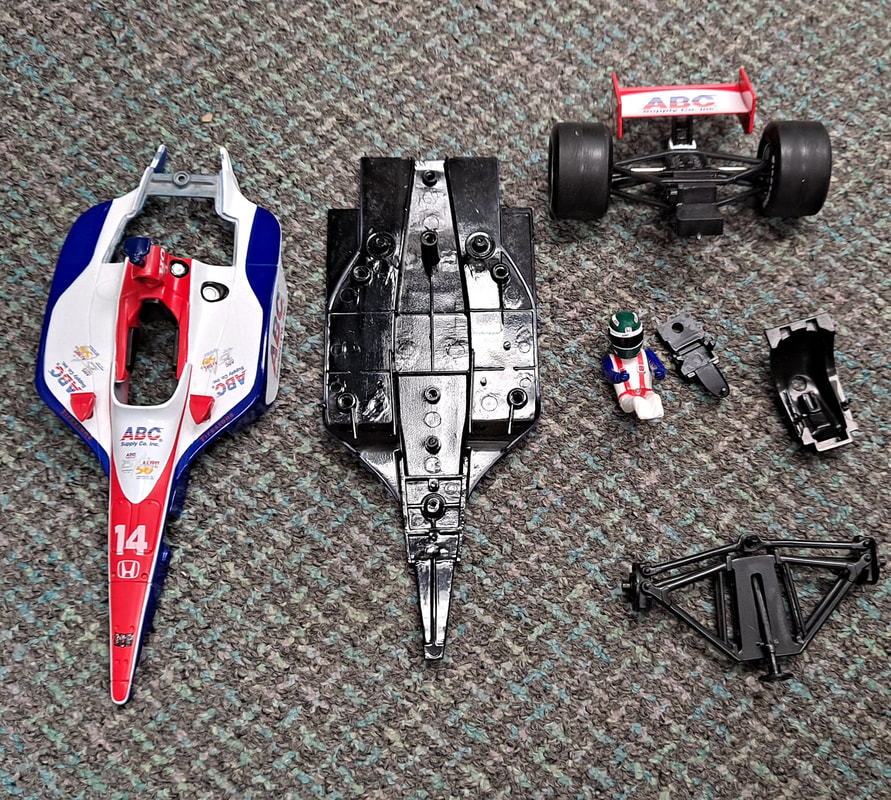
Quick step guide to disassembling Greenlight 1/18 diecasts​
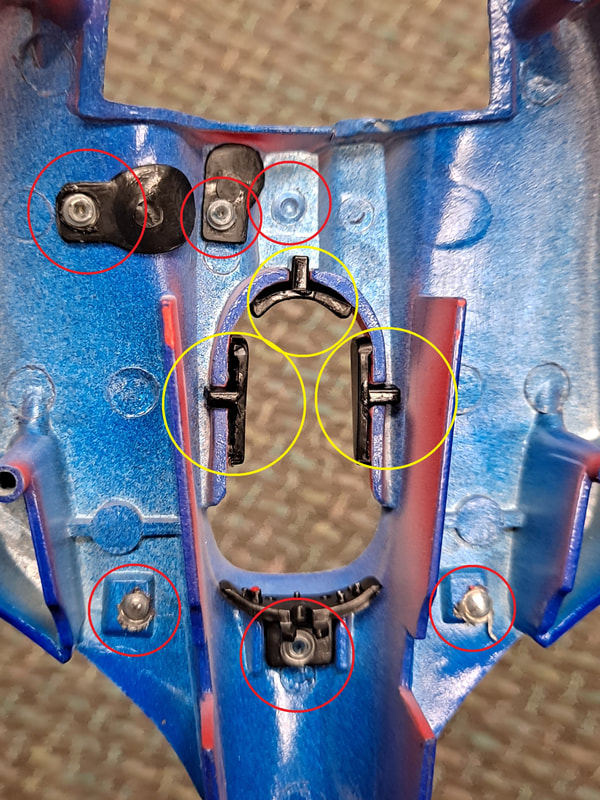
Note: This guide assumes the 2004-07 car with the fixed rear cowl. The only difference in the later car is using an Xacto knife to cut the triangles tabs from underneath the undertray before Step 4.

Tools required:
  • Small Phillips Screwdriver
  • Small Flathead Screwdriver
  • Xacto Knife
  • Mini-Hammer
  • Dremel Tool with drill bit or cutting wheel

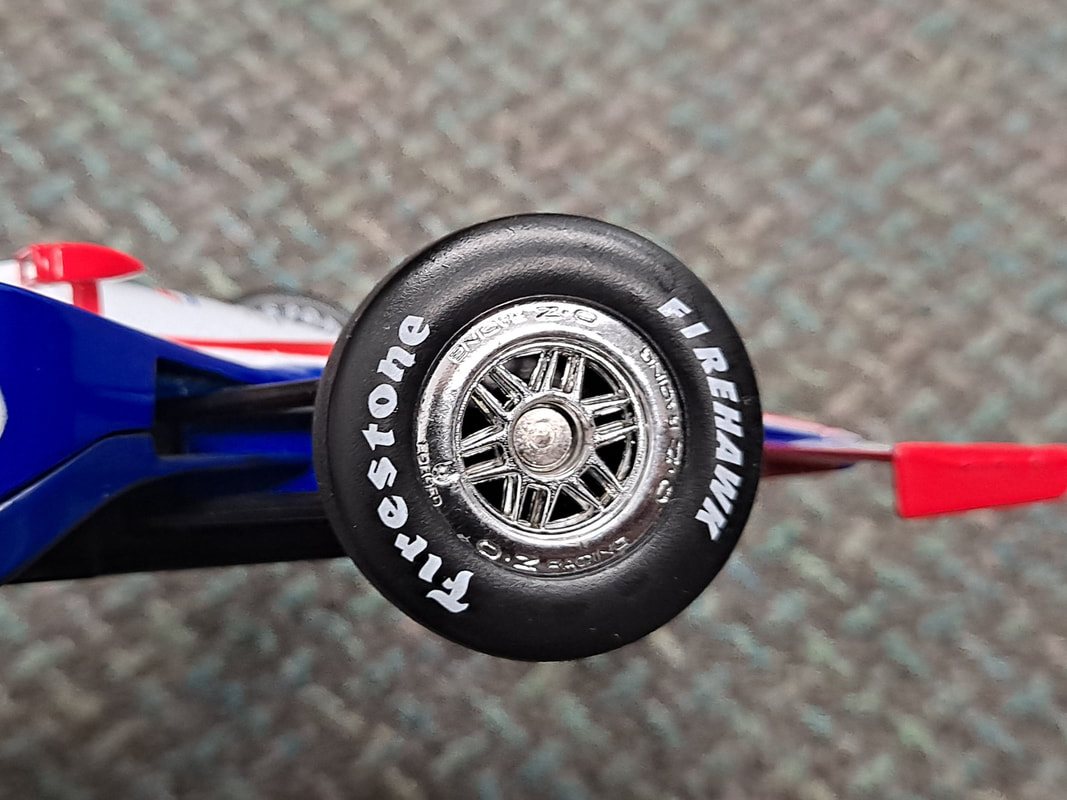
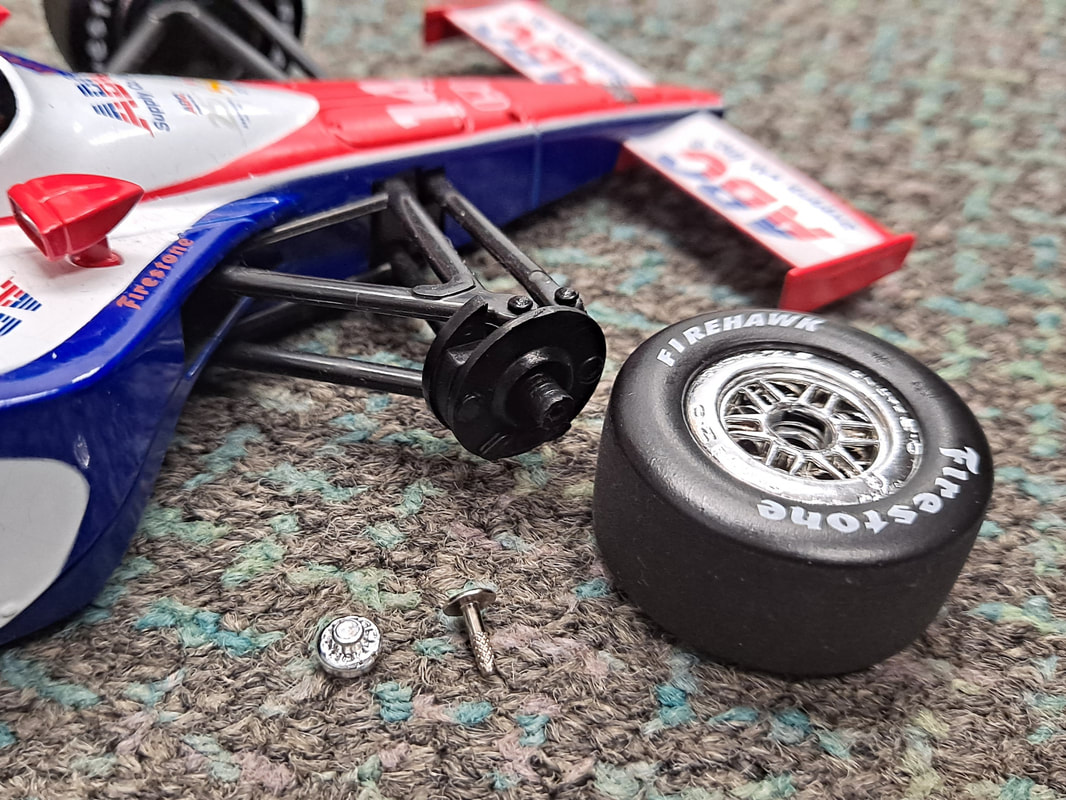
#1 - Removing the front wheels
Unlike the DW12 diecast, the wheel nuts are not glued to the rim. However, removing the wheel nut is not necessary to remove the wheels.

GPD approach: Simply grab a tire and pull away from the car while  slightly wiggling the tire back and forth. Eventually the wheel will pull free.

Alternative approach: This approach was suggested to decrease the likelihood of breaking the hub from the front suspension. After removing the wheel nut, use a power drill for a couple minutes to gently drill on the face of the metal pin to heat up. After heating up, the wheel should pull off more easily.

Note: If the original wheel nut is damaged, it can be replaced with our wheel nuts as a option or the entire rim can be replaced with one of our more accurate versions. 

Picture
Picture

#2 - Removing the front hubs (Optional)
Using an Xacto knife, cut off the melted plastic of the pegs located at the top and bottom of the front wheel hubs to remove them from the front suspension.

Picture

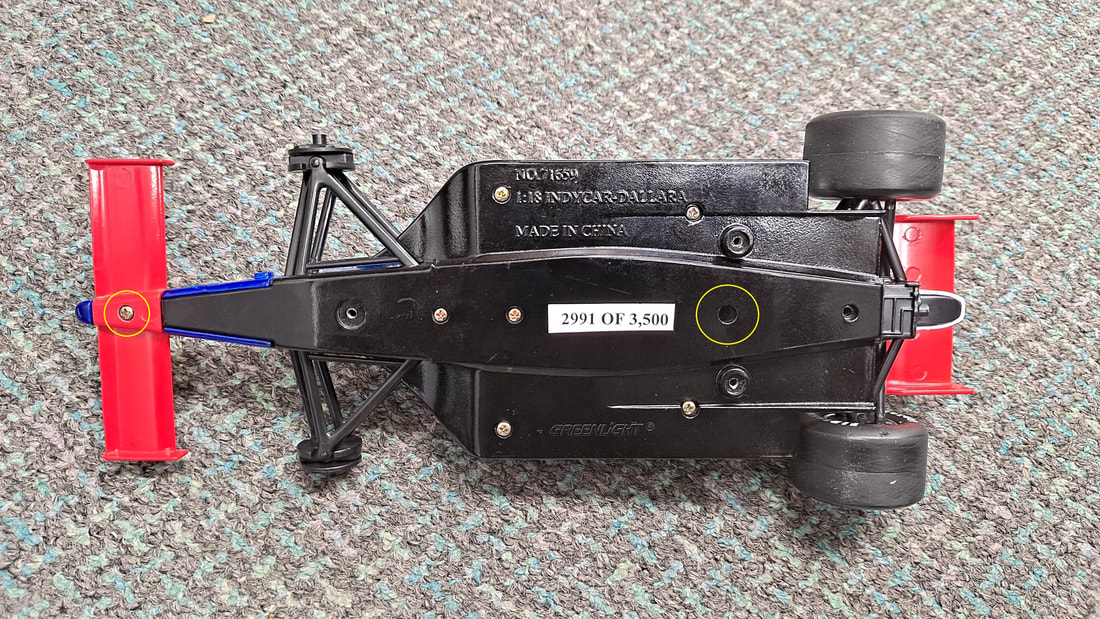
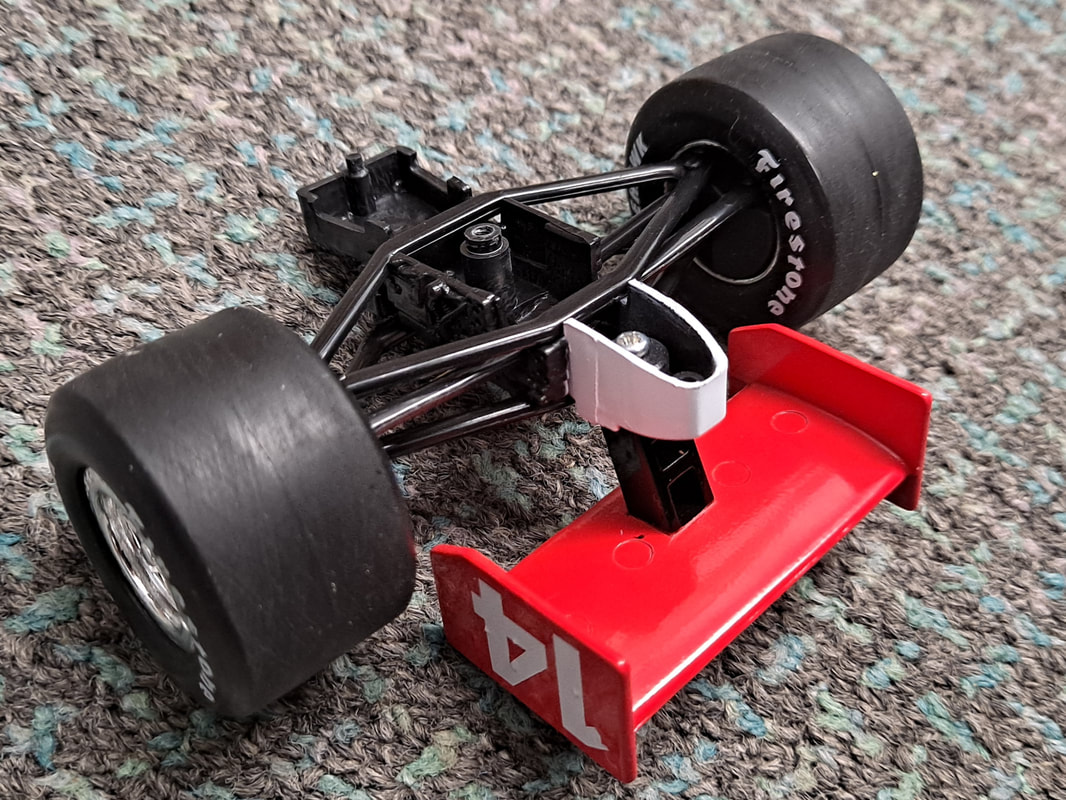
#3 - Removing the front wing & rear cowl
Using the small Phillips screwdriver, remove the screw located underneath the front wing to remove it.

Similarly, unscrew the circled screw to separate the rear cowl from the undertray.

Picture

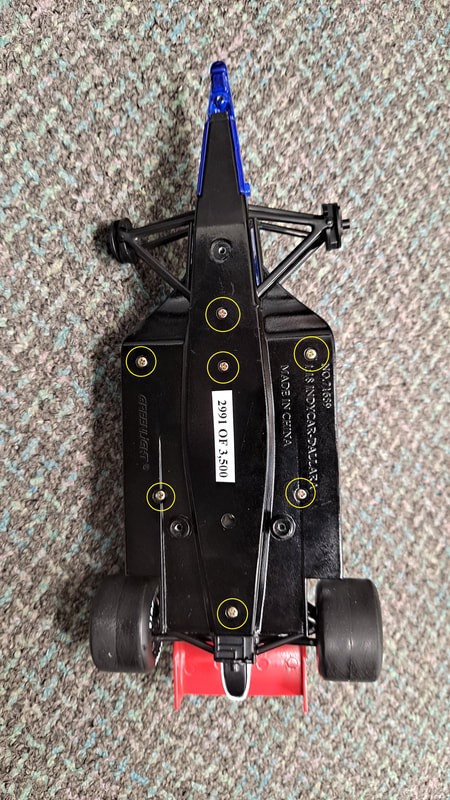
#4 - Separating the car
Using the small Phillips screwdriver, remove the remaining (7) screws from underneath the car.

Remove the car by holding the front suspension down, and making sure to push the steering wheel down in the cockpit to separate from the dashboard. 

At this point, (7) pieces should come apart: the tub, the undertray, the driver figure, the seat, the front suspension, the bottom of the gearbox/attenuator and the rear wing / rear suspension assembly.

Picture
Picture

#5 - Gearbox Disassembly
The rear wing is fixed by a screw inside the rear attenuator.

The rear wheels are connected by a metal rod and can be removed by pulling apart while wiggling back & forth.
​
At this point, the suspension and hubs can be separated from the gearbox the same as the front suspension earlier, if desired.

Picture

#6 - Tub Disassembly
The (3) pieces of the headrest can be removed by gently prying from the inside with a flathead screw driver (yellow circles). If the parts do not move immediately, an Xacto knife can be used to separate any glue between the tub and the headrest pieces.

The airbox, mirrors, fuel filler & vent along with dashboard (red circles) all require drilling out or using a rotary (Dremel-type) tool to grind out the stamping from the underside.

Picture
Proudly powered by Weebly